
We independently review and recommend rental-friendly home products. When you purchase through our links, we may earn an affiliate commission at no extra cost to you.
Installing a wireless picture light without drilling is the ultimate way to bring gallery-style illumination into a rental apartment without risking security deposit deductions. Conventional picture lights require either hardwiring directly into an electrical junction box buried in the wall or drilling heavy mounting brackets into drywall and running unsightly cords down to an outlet. For tenants guarding their security deposits, cutting into drywall or hiring an electrician is completely out of the question.
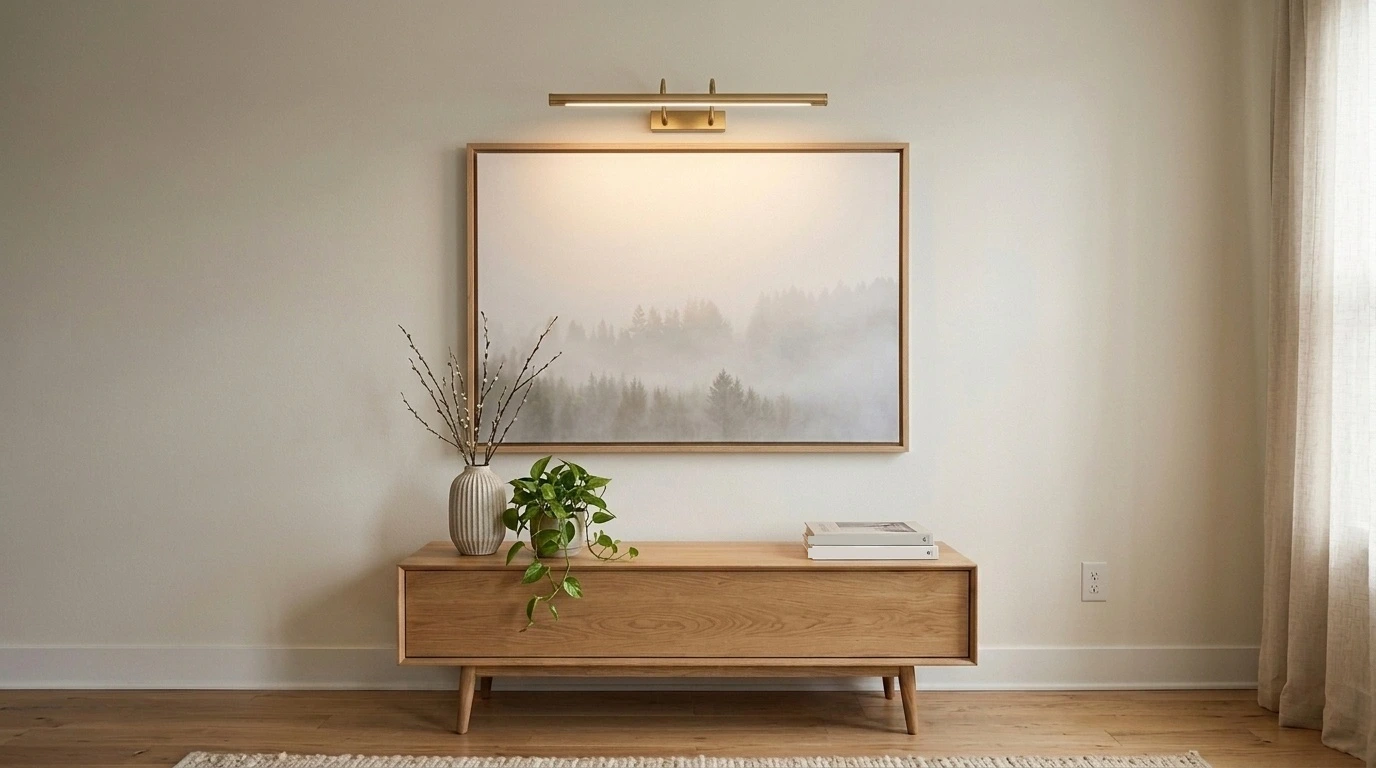
Modern wireless LED picture lights have completely solved this tenant dilemma. Powered by rechargeable lithium-ion batteries and anchored by magnetic mounting plates, these fixtures deliver museum-grade illumination without power cords or drill holes. When paired with high-capacity adhesive mounting strips, renters can mount, tilt, and recharge elegant brass or matte black art lights without risking wall damage charges on move-out day.
Quick Summary: The Renter’s Art Lighting Playbook
- Best Fixture Type: Magnetic detachable LED bar with rechargeable USB-C battery (minimum 4000mAh capacity). Avoid battery-operated pucks that require frequent disposable AA battery changes.
- Removable Mounting Method: Command Large Picture Hanging Strips applied horizontally across the metal mounting plate, delivering a 16-pound manufacturer load rating for four pairs.
- Optimal Color Temperature: 2700K to 3000K warm white with a Color Rendering Index (CRI) of 90+ to bring out rich painting pigments without blue glare or washed-out tones.
- Placement Geometry: Framing guidelines typically recommend mounting the fixture bracket 2 to 4 inches above the frame centered on the artwork, tilting the lamp head 30 to 45 degrees downward toward the canvas.
- Surface Pre-Check: Degrease mounting zone with 70% isopropyl alcohol and allow 1 hour of adhesive dwell time before snapping the magnetic light into place.
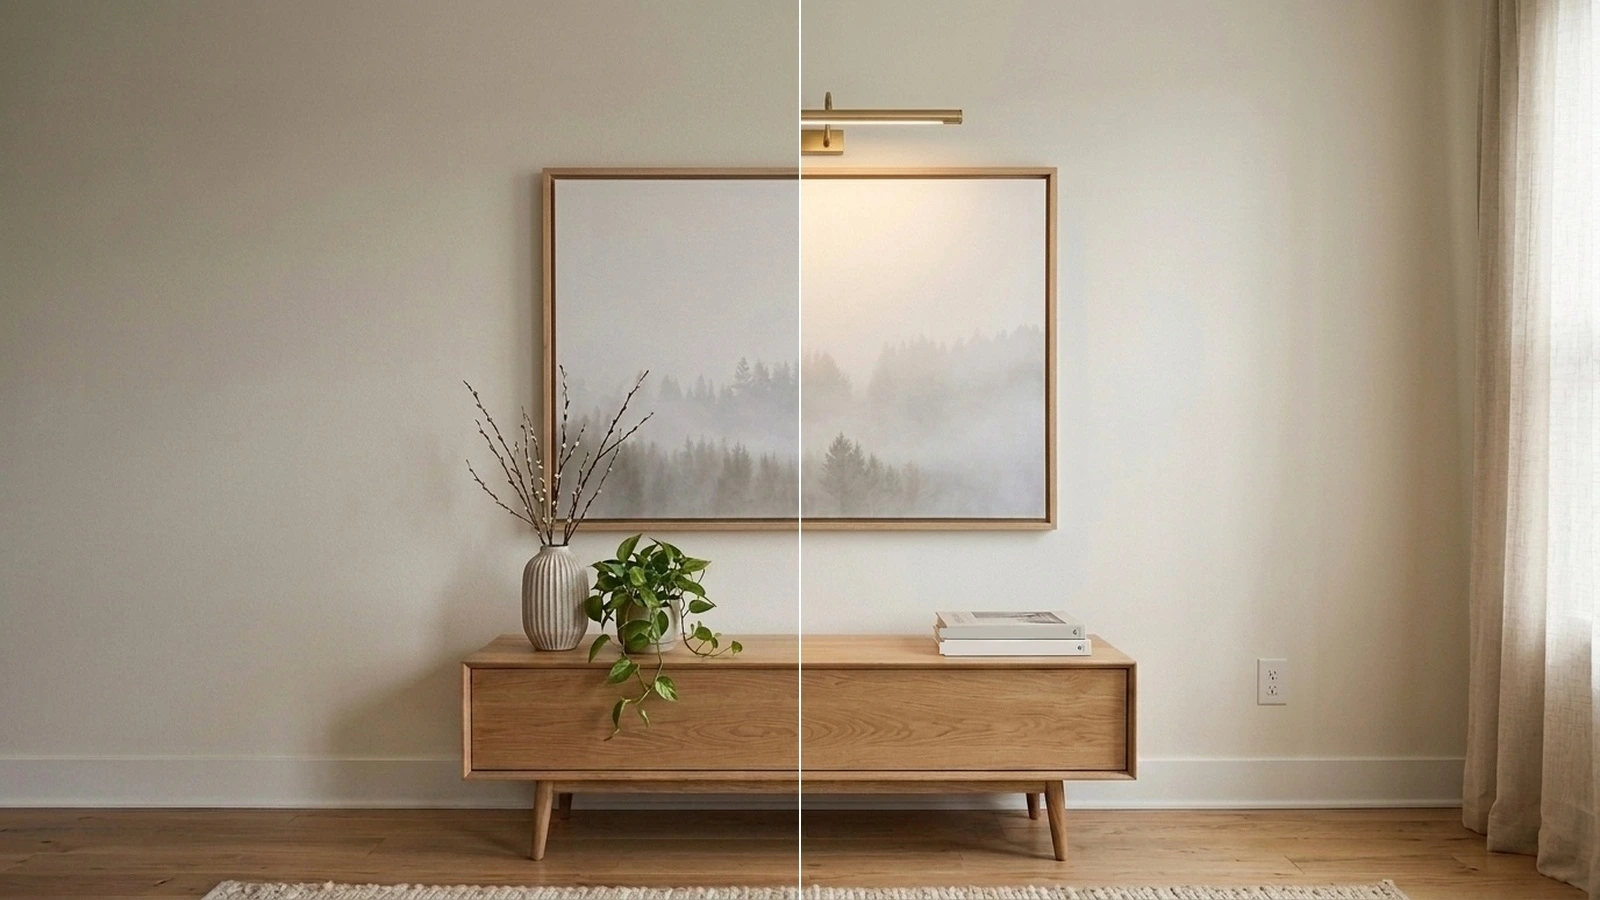
Why a Wireless Picture Light Without Drilling Works in Rentals
Most residential picture lights fail in apartments because of two mechanical obstacles: electrical access and cantilevered weight. Hardwired fixtures require cutting drywall and connecting copper wiring to a switched electrical box—an immediate lease violation in virtually all standard rental agreements. Plug-in fixtures solve the electrical barrier but leave trailing black cords dangling down the wall, disrupting the clean visual lines of an accent wall or renter-friendly wall moulding installation.
Cordless picture lights bypass these obstacles by integrating high-density rechargeable batteries directly into the fixture body. Modern cordless LED picture lights typically weigh between 0.8 pounds and 1.5 pounds (or 13 to 24 ounces), featuring fixture bar widths from 12 inches to 16 inches (or 30 to 40 centimeters) that illuminate standard prints and canvases. Because the light bar attaches to its mounting base via high-strength neodymium magnets, you can snap the light off effortlessly for USB-C recharging every few weeks without disturbing the adhesive bond on your wall.
Mounting Methods: Wall Mount vs. Frame Mount vs. Puck Hack
When installing art lighting in a rental space, tenants typically weigh three different approaches. Review the structural trade-offs below before purchasing your hardware:
| Mounting Method | Deposit Risk | Recharge Convenience | Aesthetic Finish | Best Application |
|---|---|---|---|---|
| Magnetic Wall Mount (Recommended) | Very Low (Parallel stretch-release strips) | High (Light bar pops off magnet in seconds) | High-End (Sleek brass/black floating arm) | Framed prints, canvases, gallery walls |
| Frame-Mounted Bracket | Zero Wall Risk (Anchors into your own frame) | Moderate (Must reach behind frame or slide out) | Traditional (Classic gallery appearance) | Heavy solid wood frames you own |
| Battery Puck Light Hack | Low (Adhesive discs) | Low (Bulky, frequent battery swapping) | Casual (Diffused, uneven downward beam) | Budget dorms or temporary closet art |
While frame-mounted brackets eliminate wall contact entirely by screwing into the back of your picture frame, they only work on sturdy wooden frames that you personally own. If you have thin metal poster frames, thrifted composite frames, or lightweight canvas wraps, the magnetic wall-mount method using Command strips provides far greater stability and protects your frame moulding from splitting.
Understanding Rotational Torque and Holding Strength
The primary reason DIY picture lights fall off rental walls is a misunderstanding of leverage. Unlike flat picture frames that pull strictly downward along the wall (shear force), a picture light features an extended arm that projects 4 to 8 inches (or 10 to 20 centimeters) outward into the room. This horizontal extension acts as a lever arm, exerting continuous outward rotational torque on the top edge of the mounting bracket.
Standard small utility hooks or thin double-sided foam tapes cannot withstand this rotational peeling motion. To counteract leverage, you need interlocking hook-and-loop strips with substantial surface area. Using Command Large Picture Hanging Strips provides a manufacturer-rated load capacity of 16 pounds for four pairs (or 4 pounds per pair) with an operating temperature of 50°F to 105°F (10°C to 40°C). For a fixture weighing approximately 1.2 pounds, this provides an 8x to 10x safety buffer that securely absorbs outward rotational torque.
Mandatory Surface & Safety Checks Before Installing
- Fresh Paint Cure Window: If your rental unit was freshly painted prior to move-in, fresh interior paint requires 14 to 30 days of curing time before applying pressure-sensitive adhesive mounting strips. Adhesives applied to uncured latex paint bond to the soft surface film and can pull paint layers off the drywall upon removal.
- Wall Texture Limitations: Adhesive strips adhere best to smooth drywall or lightly textured surfaces. On heavy knockdown or aggressive orange-peel plaster, surface contact is significantly reduced; consider frame-mounted brackets instead.
- Moisture & Heat Clearances: Do not install wireless picture lights directly above active steam vents, radiators, or working fireplaces where ambient heat exceeds 105°F (40°C), as elevated temperatures soften adhesive polymers.
- Overhead Glass Safety: If mounting a light bar above heavy glass-framed prints over a bed or seating area, ensure your art frame is securely hung with rated hardware before adding the light fixture, as detailed in our guide to hanging a gallery wall without drilling.
- Electrical Integrity: Do not tamper with existing in-wall electrical boxes or attempt to splice battery cables into building wiring; follow local building guidelines and keep battery units self-contained.
Step-by-Step Installation: How to Mount Your Picture Light
Follow this tested sequence to achieve a level, rental-friendly installation that withstands repeated magnetic detachment during recharging.
Step 1: Prep the Surface and Map Your Level Line
Position your framed artwork on the wall first. Using a measuring tape, locate the exact horizontal center of the picture frame. Framing guidelines typically recommend mounting the fixture bracket 2 to 4 inches (or 5 to 10 centimeters) above the frame centered on the artwork. This height ensures the light beam covers the entire artwork without casting harsh shadows from the top frame lip.
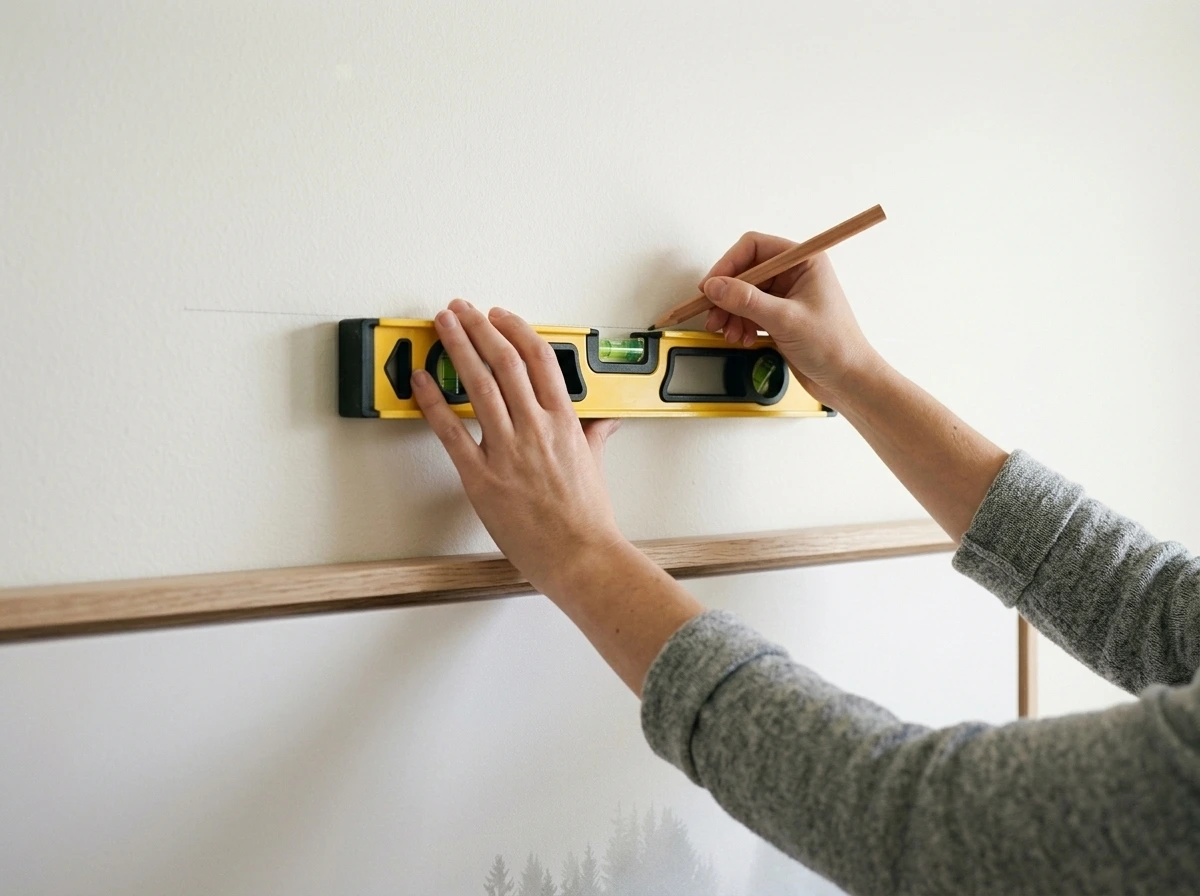
Wiping the wall with 70% isopropyl alcohol removes grease and dust without leaving soapy residue, and waiting 10 to 15 minutes allows the surface to dry completely before applying adhesive. Do not use household spray cleaners, glass cleaners, or dish soap wipes, as they leave microscopic surfactant films that prevent adhesive bonding. Hold a small torpedo level across the top edge of the metal mounting bracket to confirm a level horizontal alignment.
Step 2: Apply Command Large Strips with Horizontal Orientation
When mounting a wireless picture light without drilling, adhesive geometry is critical. Take two pairs of Command Large Picture Hanging Strips. Snap the pairs together until you hear an audible click. Peel the green liner from one side of each pair and press them firmly onto the back of the metal mounting plate. Apply the strips horizontally across the top and bottom edges of the plate to maximize surface contact against outward rotational torque.
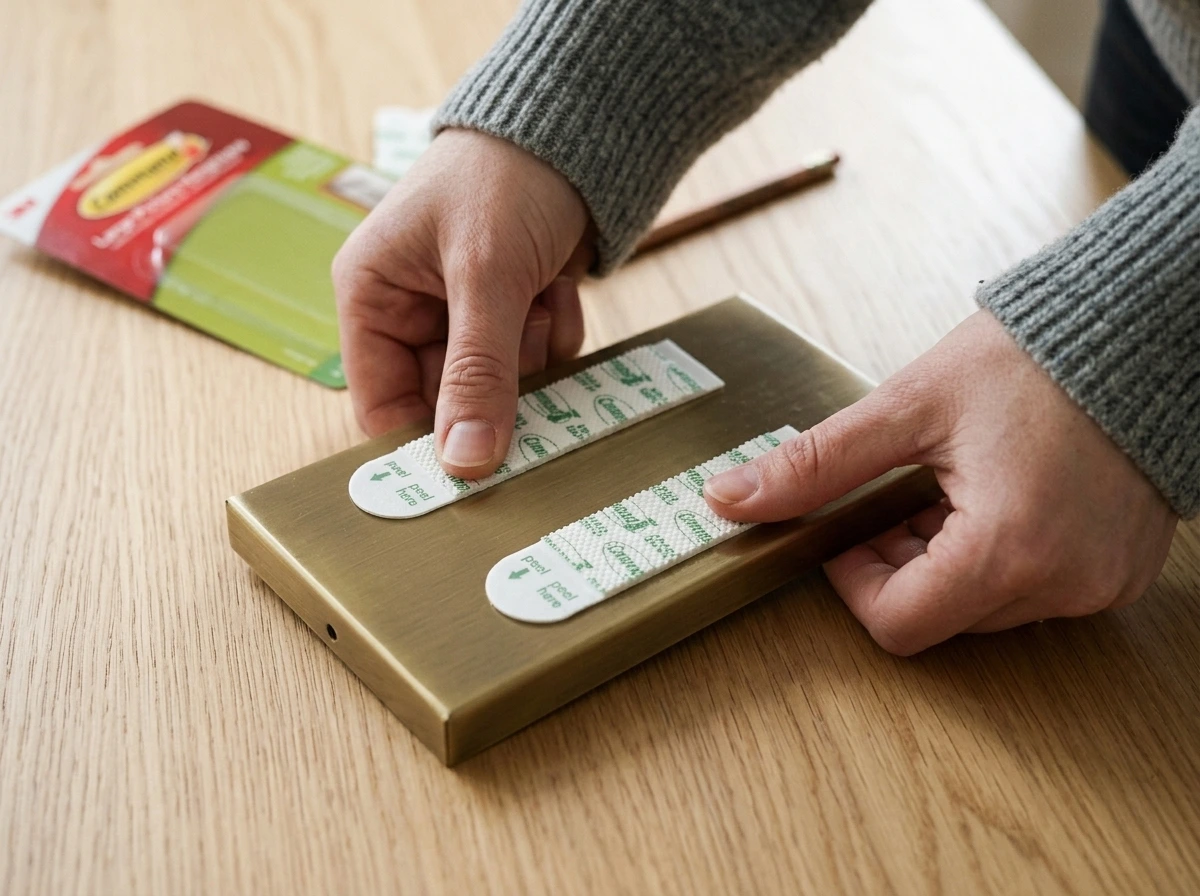
Peel the remaining liners to expose the wall-side adhesive. Align the bracket with your level pencil marks and press firmly against the drywall. Pressing the mounting bracket firmly for 30 seconds and allowing a minimum dwell time of 1 hour (or 60 minutes) gives the adhesive polymer time to build full bonding strength before you snap on the light fixture. Next, slide the bracket upward to separate the hook-and-loop strips, leaving the wall-side strips in place. Press directly on the wall strips with your thumbs for 30 seconds, and allow the 1-hour dwell time to finish curing.
Step 3: Snap Magnetic Light Bar & Test Detachment
After the 1-hour cure window, press the metal mounting bracket back onto the wall strips until the interlocking fasteners click securely into place. Take your wireless picture light fixture and align the magnetic base with the wall plate. High-strength internal magnets will snap the light bar firmly into position.
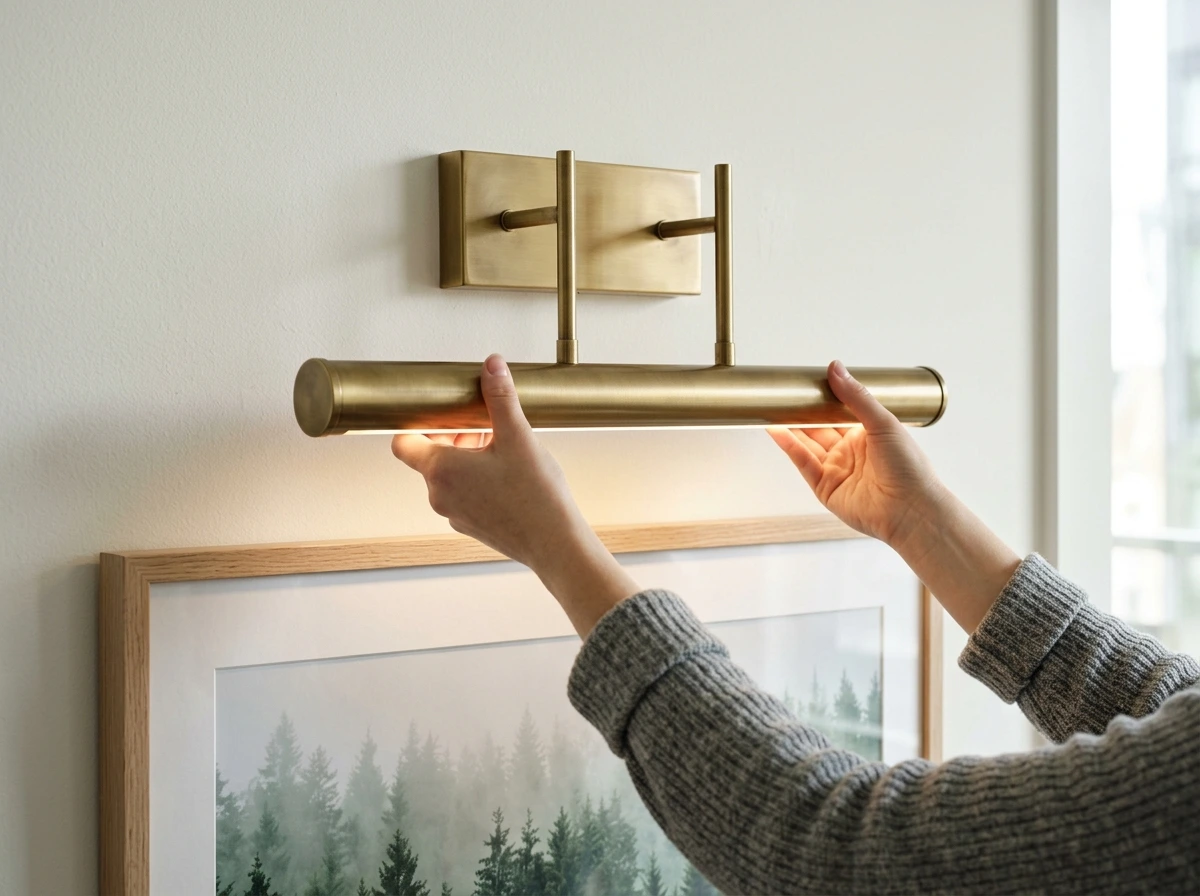
Tilt the lamp head on its swivel arm, angling the LED beam 30 to 45 degrees downward toward the optical center of the artwork. This angle illuminates the painting evenly while directing reflections away from the viewer’s line of sight. Test detaching the light bar by pulling it gently toward you; the magnetic connection should release smoothly without flexing the wall adhesive plate, ensuring easy access for USB-C recharging. For more cordless ambient lighting ideas, explore our tutorial on wireless puck light wall sconce hacks.
Step 4: Clean Move-Out Removal Protocol
When moving out of your rental apartment, removing a wireless picture light without drilling cleanly requires following the manufacturer’s stretch-release mechanics. Detach the light bar from the magnetic plate and store it in your packing boxes. Grab the bottom edge of the metal mounting bracket and lift it upward to disconnect the interlocking fasteners.
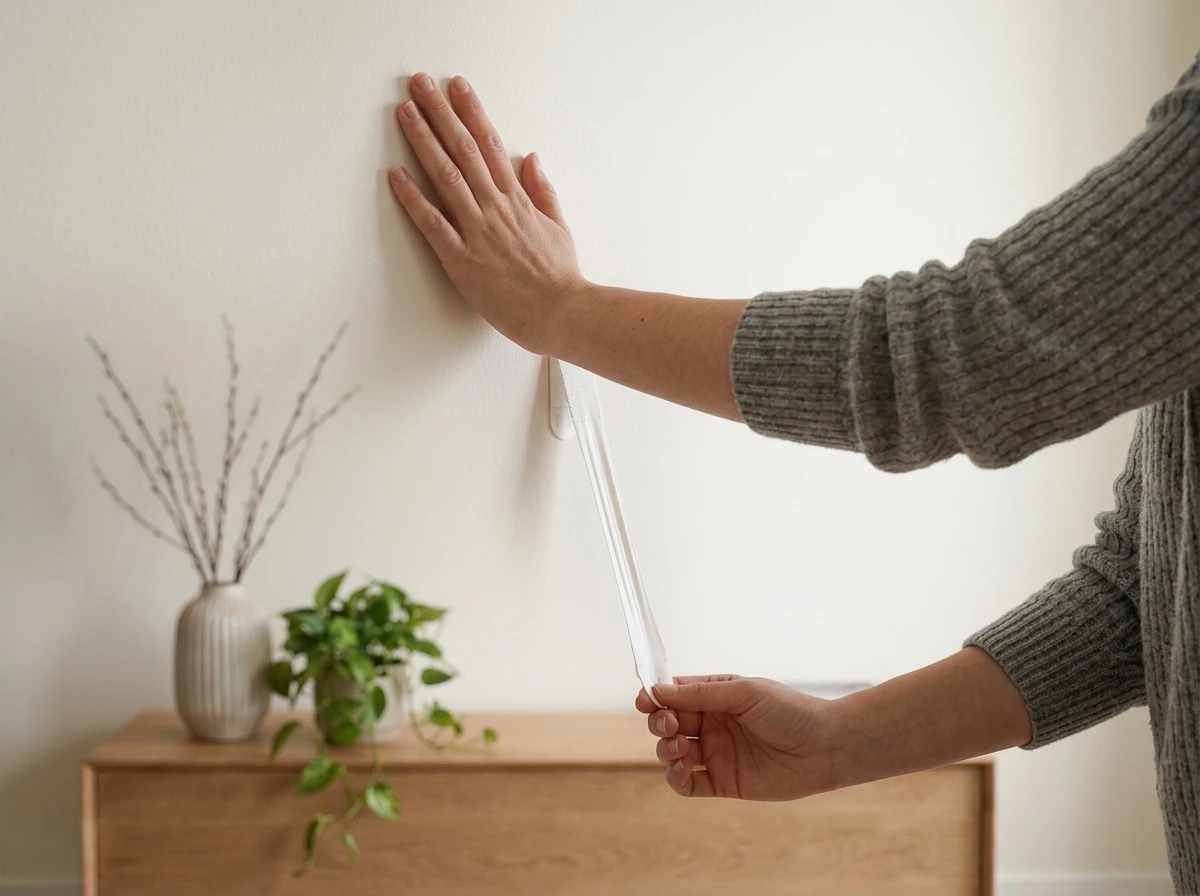
To remove the mounting bracket at move-out, pull the Command tab slowly straight down flat against the wall, stretching the strip 12 to 15 inches until it releases smoothly without tearing drywall paper, using a hair dryer on low heat for 20 to 30 seconds held 4 to 6 inches away if the adhesive needs gentle softening. Avoid pulling the tab outward at a 90-degree angle, as this focuses peeling stress on the drywall paper and can tear paint.
Lighting Performance: Lumens, CCT & Battery Tips
Getting the most out of your art light depends on choosing the correct optical specifications and managing your charging cycle:
- Color Temperature (CCT): Selecting a picture light with a warm 2700K to 3000K or 4000K color temperature and a Color Rendering Index of 90+ ensures rich, natural pigment rendering that highlights artwork textures without harsh glare or color distortion. A warm 2700K to 3000K setting mimics incandescent museum lighting for oil paintings and warm wood frames, while 4000K provides neutral crisp contrast for modern prints.
- Color Rendering Index (CRI): Look for a CRI rating of 90+ to ensure accurate pigment rendering without washed-out tones.
- Battery Management: Rechargeable picture lights feature built-in 4000mAh to 5000mAh Lithium-ion batteries that provide 10 to 48 hours of run time depending on brightness, recharging via a standard USB-C cable in 3 to 5 hours. Running your light at moderate brightness provides ample evening accent lighting while extending runtime between charges.
- Auto-Off Timers: Use the wireless remote control to set automated shutoff timers. This prevents accidental overnight battery drain and keeps your fixture ready for evening entertaining. Similar smart power management techniques can also be used with under-cabinet wireless LED lighting in rental kitchens.
Frequently Asked Questions
Can I attach a wireless picture light to a canvas frame?
Yes. If your canvas is stretched over wooden stretcher bars of sufficient depth, you can mount a frame-mount bracket directly to the top wooden bar using short wood screws. This avoids wall contact entirely. However, if your canvas is lightweight, the wall-mounted magnetic bracket method described above is safer because it prevents the weight of the light from tilting the canvas outward at the top.
How often do I need to recharge a cordless art light?
With an integrated 4000mAh to 5000mAh Lithium-ion battery, typical runtime is 10 to 48 hours depending on brightness. If you illuminate your artwork for brief accent periods each evening using an automated timer, you will only need to plug the light into a USB-C charger once every few weeks. Recharging via a standard USB-C cable in 3 to 5 hours restores full battery capacity.
Will Command strips hold the weight of a brass picture light?
Yes, provided you use Command Large Picture Hanging Strips. Modern cordless LED picture lights typically weigh between 0.8 pounds and 1.5 pounds (or 13 to 24 ounces), while four pairs of Command Large strips are rated for 16 pounds. Because the light arm extends outward, mounting the strips horizontally across the plate provides the leverage resistance necessary to counteract rotational torque. Allow the 1-hour adhesive cure time before attaching the light fixture.
