
Reader Disclosure: This post contains affiliate links. When you purchase through our links, we may earn an affiliate commission at no extra cost to you.
Quick Summary: How to Use Tension Pole Shelving in Rental Apartments
Renters can install vertical storage using floor-to-ceiling tension pole shelving without drilling into drywall or studs. These modular systems utilize internal spring compression or telescoping twist-locks between the solid subfloor and ceiling framing. When positioned against solid drywall backed by structural ceiling joists and loaded within manufacturer ratings—typically 10 pounds per individual basket and up to 66 pounds total distributed static load on heavy-duty steel systems—tension pole shelving provides reliable vertical storage while preserving underlying rental finishes. Clean removal and surface preservation depend on proper spring tension, joist alignment, and ceiling condition.
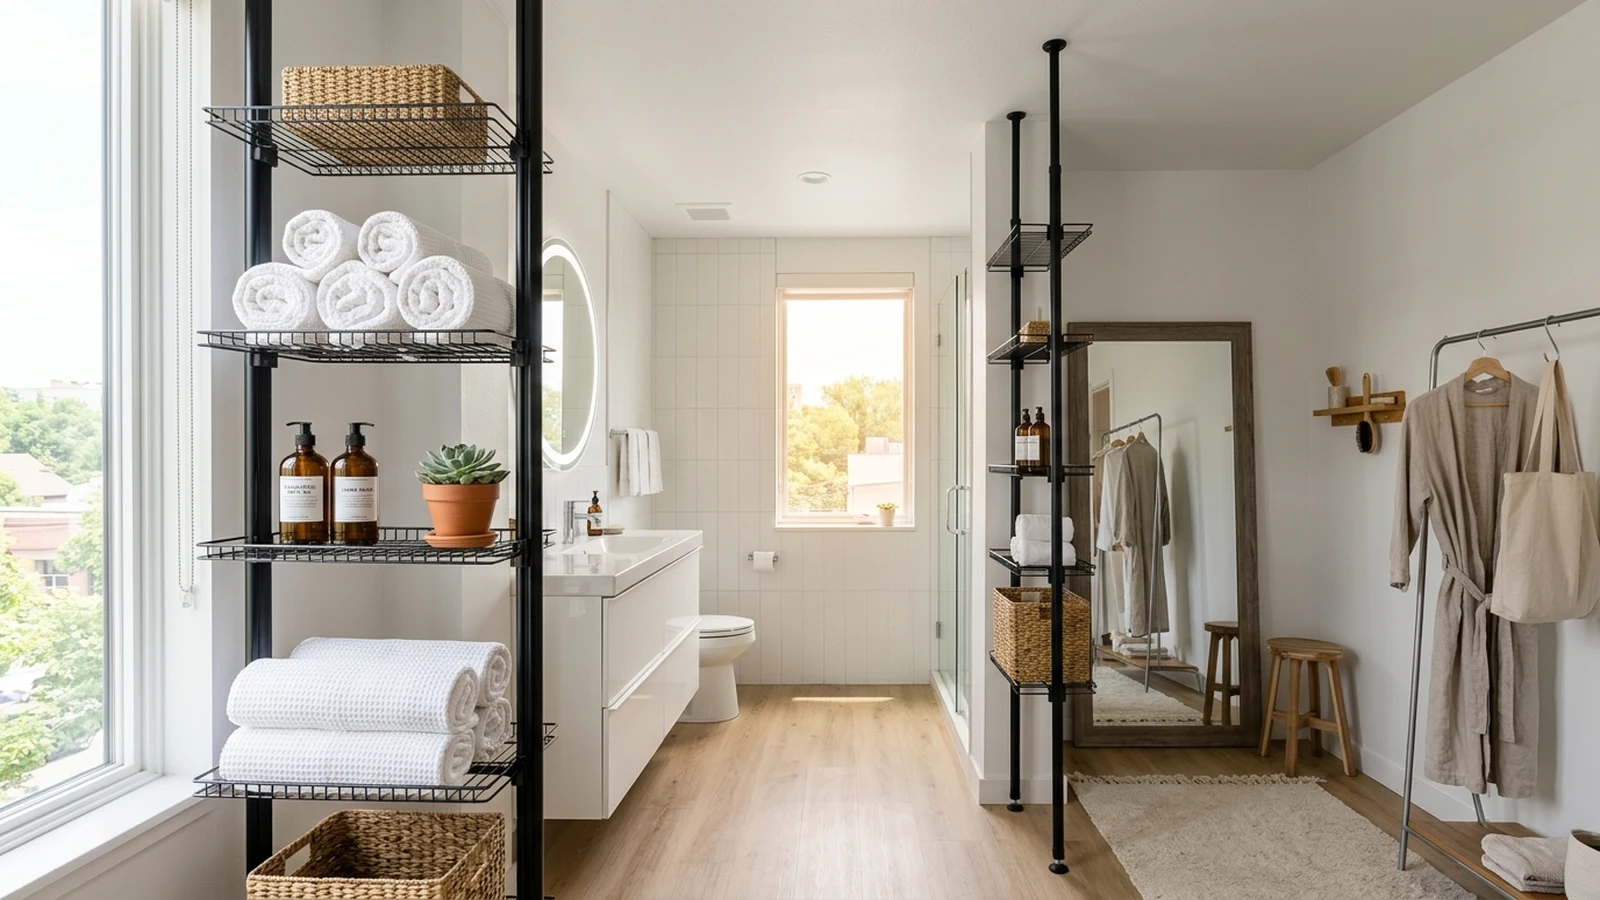
Maximizing usable square footage in compact rental apartments requires thinking vertically. However, traditional floating shelves and heavy wall-mounted cabinets require drilling holes into drywall and driving masonry or toggle anchors into framing—modifications that standard apartment lease agreements either prohibit or penalize with security deposit deductions. Floor-to-ceiling tension pole shelving solves this dilemma by relying entirely on vertical compressive friction, creating customizable storage columns without mechanical wall penetrations.
Whether you need extra pantry storage in a compact kitchen, open shelving in a living room nook, or vertical caddy tiers in a small bathroom, tension pole shelving allows renters to expand their storage footprint. By understanding ceiling framing, weight ratings, and proper assembly techniques, you can enjoy sturdy vertical storage that disassembles cleanly on moving day.
Table of Contents
Pre-Installation Ceiling & Substrate Feasibility Checklist
Before buying or setting up tension pole shelving, inspect your ceiling and floor surfaces to verify compatibility:
- Structural Joist Alignment: For heavy-duty shelving units, align the top foot directly beneath a ceiling joist, typically spaced 16 inches or 24 inches on center behind standard 1/2-inch drywall. Positioning the pole beneath solid wood framing prevents flexing hollow drywall spans.
- Drop Ceiling Prohibition: Do not install tension poles against suspended drop ceilings or commercial acoustic mineral fiber panels. These non-structural grids collapse under upward compressive force.
- Popcorn & Friable Ceilings: On textured popcorn ceilings, place a rigid buffer disc between the foot and the ceiling to protect the texture from direct compression marks.
- Parallel Ceiling Geometry: Standard tension pole shelving requires parallel, horizontal planes. Slanted, cathedral, or vaulted ceilings cause lateral slippage unless equipped with manufacturer-approved articulating angled feet.
- Moisture & Rust Prevention: Select 304 stainless steel or powder-coated aluminum poles for high-humidity bathrooms to eliminate corrosion risks.
Vertical Storage Systems Comparison: Tension Poles vs. Traditional Shelving
Review load limits and wall impact before selecting a storage system for your rental home:
| Storage System Type | Mounting Mechanism | Static Load Rating | Ceiling & Wall Impact |
|---|---|---|---|
| 4-Tier Tension Corner Caddy | Spring-loaded compression foot (56 inches to 114 inches) | 10 pounds per basket; up to 22 pounds total distributed load | Compressive rubber pad; requires no drilling or wall screws |
| Heavy-Duty Carbon Steel Pole Unit | Telescoping mechanical twist-lock (82 inches to 122 inches) | Up to 66 pounds total distributed static load | High-friction elastomer foot; requires joist backing |
| Traditional Floating Wall Shelves | Drywall expansion anchors or wood screws into wall studs | High static capacity when anchored into framing | Leaves anchor holes requiring spackling and repainting |
Essential Tension Pole Hardware Specifications
Selecting the appropriate tension pole shelving unit depends on room dimensions, humidity exposure, and expected storage mass:
- Shower & Bathroom Corner Caddies: According to ALLZONE manufacturer specifications, ALLZONE tension poles adjust between 56 inches and 114 inches to fit standard room heights. These models feature corrosion-resistant 304 stainless steel tubes designed for shower enclosures and vanity corners. Manufacturer ratings specify up to 10 pounds per individual basket and up to 22 pounds total distributed load on corner tension caddies.
- Room & Pantry Heavy-Duty Poles: According to Songmics official guidelines, heavy-duty tension poles built with 32 mm steel tubing adjust between 82 inches and 122 inches and support up to 66 pounds total distributed static load across adjustable wire shelves and hanging rails.
- Non-Marring Elastomer Footpads: High-grade tension systems incorporate molded thermoplastic elastomer or silicone caps that maintain high static friction without leaching oils onto ceiling paint.
- Leveling & Layout Tools: A standard magnetic torpedo level is essential to verify vertical alignment across orthogonal axes during installation.
How to Install Tension Pole Shelving: 5-Step Rental Walkthrough
Follow these five steps to assemble and secure tension pole shelving in your rental apartment:
Step 1: Inspect the Floor and Ceiling Substrates
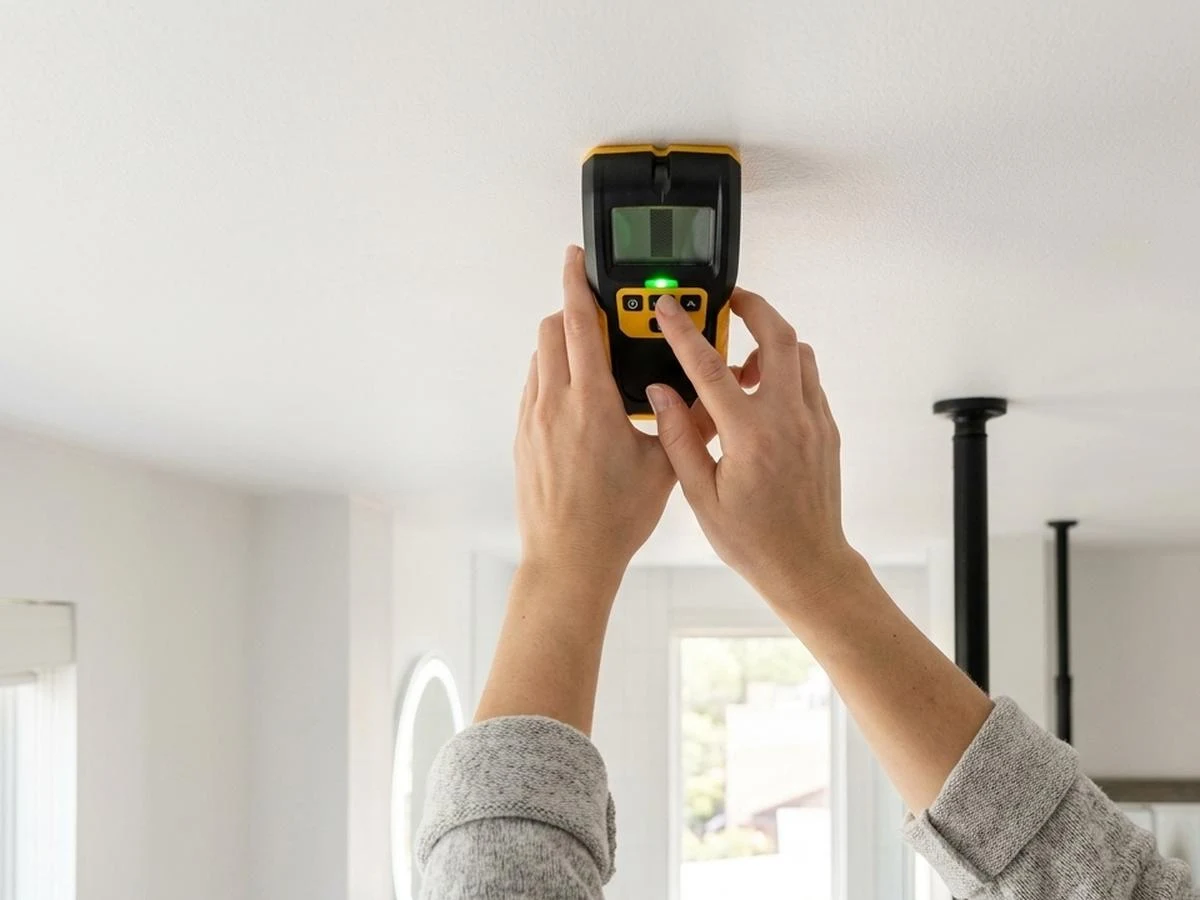
Before assembling the pole, examine your target installation zone. Tap the ceiling lightly or use an electronic stud finder to locate the underlying ceiling joists. Align the top foot directly beneath a ceiling joist, typically spaced 16 inches or 24 inches on center behind standard 1/2-inch drywall. Positioning the pole beneath solid framing prevents hairline cracking or drywall deflection. Confirm that the floor surface is level, firm, and free of loose rugs.
Step 2: Assemble Telescoping Pole Segments
Assemble the modular pole tubes according to the ceiling height of your room. For constant-tension spring systems, adjust the uncompressed pole length so it measures 1 inch to 2 inches taller than the floor-to-ceiling height before compressing the spring. This deliberate length override ensures that internal heavy-duty coil springs remain fully compressed once the pole is swung into its vertical orientation.
Step 3: Position the Base and Compress the Spring
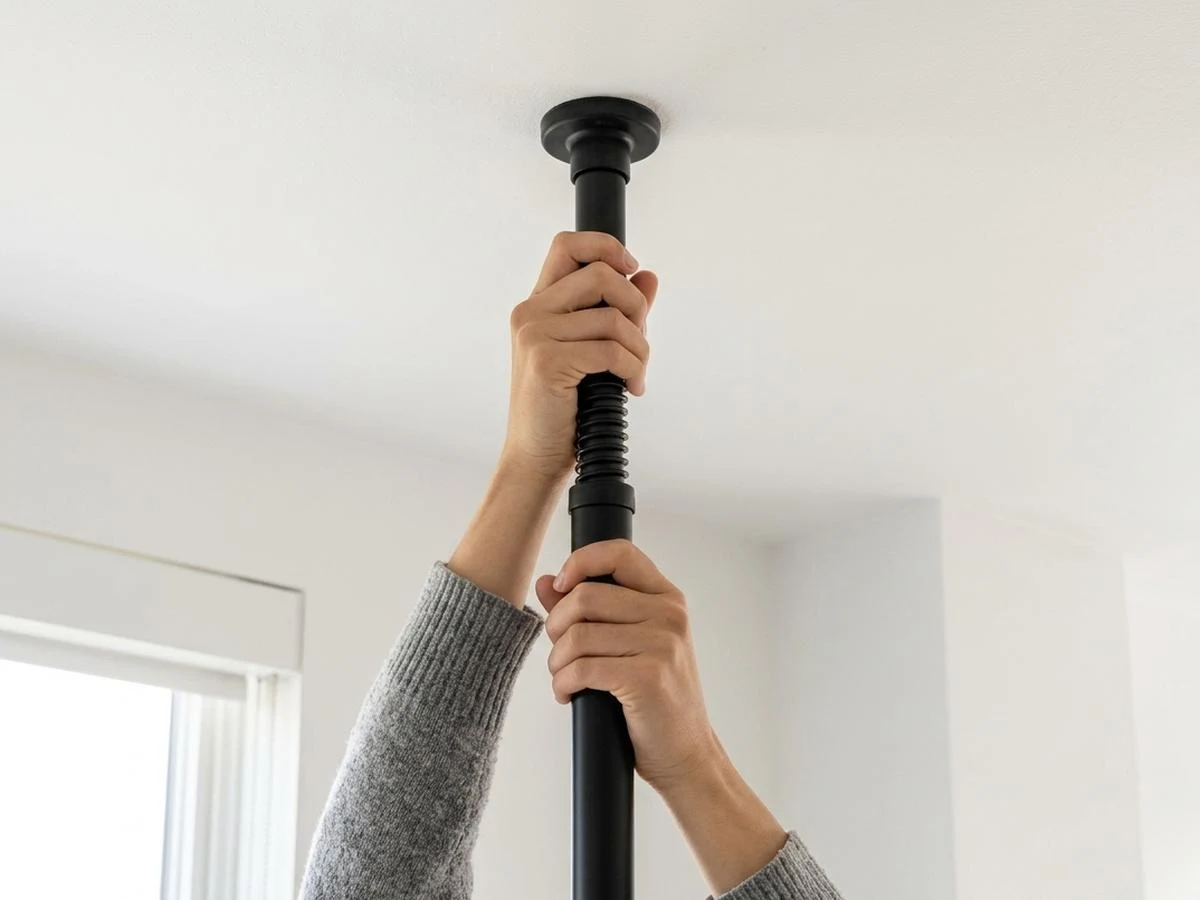
Position the lower rubber foot on the floor. If installing tension pole shelving above a bathroom fixture, standard trade guidelines typically recommend maintaining approximately 34 inches to 36 inches of clearance above the floor to clear standard toilet tank lids and allow easy plumbing maintenance. Grasp the telescoping upper section, compress the internal spring downward by hand, and swing the upper foot into position against the ceiling.
Step 4: Verify True Vertical Plumb Alignment
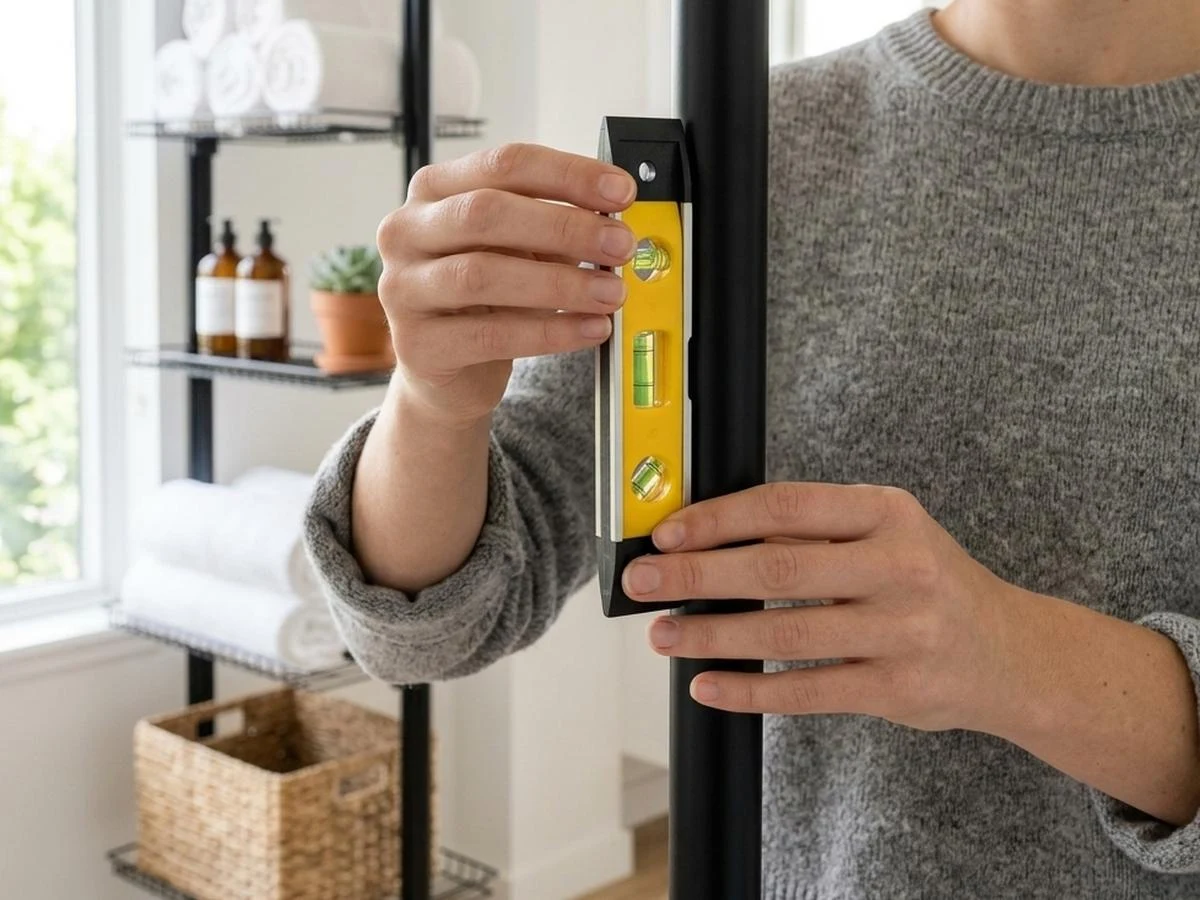
A tension pole that leans even a few degrees off-axis introduces lateral rotational forces that degrade compressive stability. Place a torpedo level flush against the side of the pole, adjusting the base until the bubble centers. Rotate the level a quarter turn around the pole circumference to verify that the pole is plumb across both perpendicular planes. Tighten the secondary mechanical locking collar or safety pins securely.
Step 5: Install and Distribute Shelf Loads
Attach the modular shelves, wire baskets, or cantilever hooks to the pole at your desired ergonomic heights. Secure each shelf collar using the included rubber compression rings or thumbscrews. Load items deliberately, following weight distribution best practices.
Weight Distribution & Center-of-Gravity Safety
Vertical tension systems derive their structural rigidity from upward normal force. To ensure mechanical stability during daily usage of your tension pole shelving, follow these operational rules:
- Bottom-Heavy Mass Distribution: Place your heaviest pantry cans, laundry detergent jugs, or stacked bath towels on the bottom two shelves. Reserving the upper tiers for lightweight items lowers the overall center of gravity and prevents top-heavy pendulum forces.
- Individual Shelf Thresholds: Adhere strictly to manufacturer limits: up to 10 pounds per individual basket on caddy units, even if the total pole system is rated for greater combined loads. Localized overloading can cause plastic support wedges to slip down the shaft.
- Dynamic Force Caution: Avoid yanking towels or cords rapidly downward from upper shelves. Sudden dynamic downward shock loads momentarily overcome spring tension and can shift the top footpad.
Maintenance & Periodic Compression Checks
Residential rental buildings experience subtle seasonal shifts. Temperature fluctuations and indoor humidity changes cause building framing to expand and contract over time. Follow these maintenance protocols for tension pole shelving:
- Periodic Inspections: Maintenance guidelines typically recommend inspecting the firmness of the tension pole around every 3 months to 6 months to ensure the spring remains firmly seated by grasping the mid-shaft and gently testing for lateral play.
- Spring Adjustment: If the pole shifts during testing, loosen the locking collar, re-compress the internal spring upward against the ceiling, and re-tighten the collar.
- Cleaning Stainless Steel: In damp bathrooms, wipe the metal pole tubes periodically with a damp microfiber cloth to remove soap scum and mineral deposits. Avoid abrasive scouring pads that scratch protective anti-corrosion coatings.
Clean Removal & Surface Preservation Protocol
When preparing to move out of your rental apartment, disassembling tension pole shelving leaves original building surfaces intact when executed correctly:
- Unload all items from the shelves and remove the modular caddies from the pole.
- Firmly grasp the upper telescoping tube with both hands.
- Pull the upper section downward against the internal spring to disengage compressive contact with the ceiling.
- Slowly tilt the top of the pole outward into the room before lifting the bottom foot off the floor. Do not drag the rubber foot across ceiling paint, which can cause rubber friction marks.
- Inspect the ceiling contact area. If slight dust or cosmetic residue is present from the rubber pad, wipe the spot gently with a damp cloth and mild dish soap.
Related Renter Guides
- Under-Cabinet Wireless LED Lighting: task lighting for rental kitchens without wiring.
- No-Drill Gallery Wall Guide: hang art and frames safely with adhesive strips.
- How to Hang Curtains Without Drilling: tension rods and tap-in brackets for rental windows.
- Wireless Puck Light Sconce Hack: wall sconces mounted without hardwiring.
Frequently Asked Questions
Can tension pole shelving damage drywall ceilings?
Tension pole shelving exerts vertical upward compressive force against the ceiling plane. When installed directly beneath a solid ceiling joist, drywall flex is prevented. However, installing a high-tension pole in the center of an unsupported drywall expanse can cause slight deflection. Positioning the pole directly beneath solid wood framing or placing a rigid buffer plate against the ceiling distributes upward compressive pressure across the drywall surface.
Do tension poles work on popcorn or textured acoustic ceilings?
Direct compression from a small rubber foot can crush friable acoustic popcorn texture nubs. To safely install tension pole shelving against a popcorn ceiling, place a smooth, rigid disc between the top foot and the ceiling to distribute compressive pressure across a broader surface area.
Can tension pole organizers hold heavy kitchen appliances?
Most standard tension pole shelving systems are engineered for pantry cans, spices, and lightweight dry goods with maximum individual shelf limits of 10 pounds on wire caddies. Heavy countertop appliances such as stand mixers or microwave ovens exceed safe cantilever limits and should be stored on sturdy base cabinets rather than vertical tension poles.
Will a tension pole caddy slip on slick tile or fiberglass tub ledges?
Tension pole feet utilize high-friction thermoplastic elastomer pads designed to grip smooth ceramic tile and acrylic surfaces. However, soap film, bath oils, or standing water reduce static friction. Cleaning the floor contact area with isopropyl alcohol and allowing it to dry before setting tension prevents slippage.
