
Quick Assessment: Under-Sink Storage in Rental Apartments
Can you organize under-sink cabinets in a rental apartment without drilling into cabinet wood or risking water damage? Maximizing under-sink storage depends on plumbing clearances, cabinet floor protection, and freestanding modular hardware. Following our under-sink organization rental strategy, standard base cabinets measure between 24 inches and 36 inches in exterior width and 24 inches in exterior depth, yielding an interior usable depth of 21 to 22 inches. A heavy-duty silicone drip mat with raised 0.8-inch to 1-inch perimeter edges contains 1.5 to 3.3 gallons of liquid to protect vulnerable particleboard floors from leaks. Freestanding sliding drawers rated for 30 pounds to 45 pounds per sliding tier glide on weighted bases without screws, while adhesive door caddies provide accessible sponge storage using water-resistant strips that release cleanly at move-out.
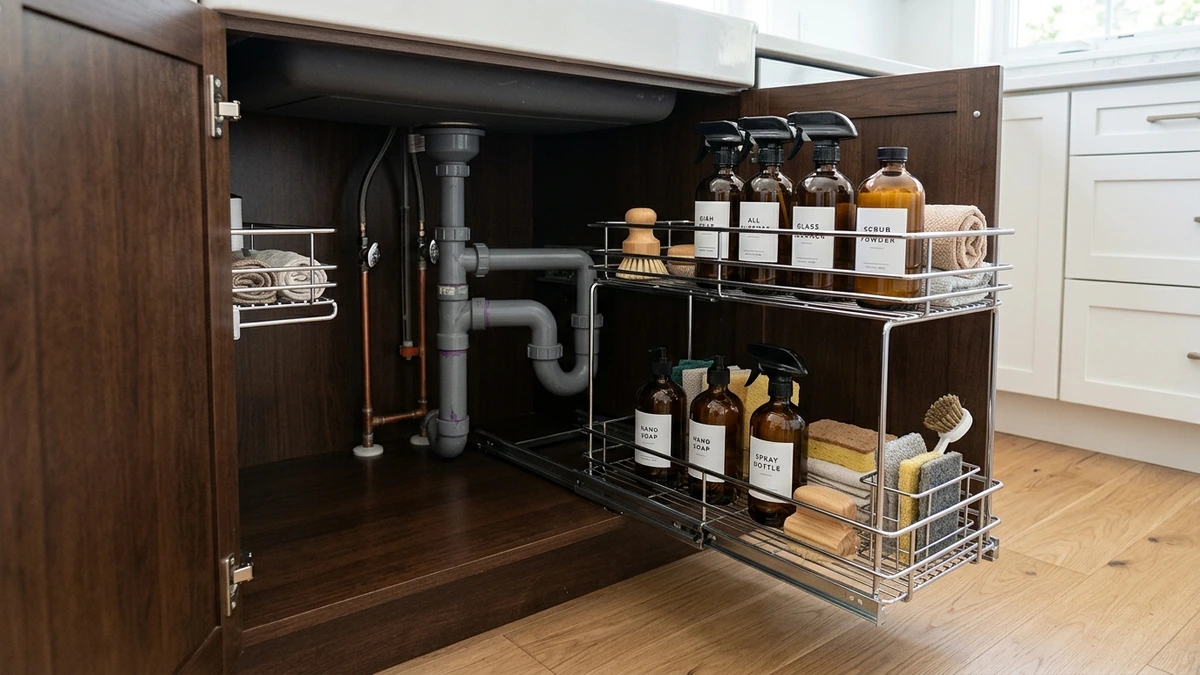
The cabinet cavity beneath kitchen and bathroom sinks is notorious for being dark, cluttered, and awkward. Between bulky vertical drain stacks, curved P-traps, hot and cold water shutoff valves, and bulky garbage disposals, renters are often left with fragmented floor space. Because standard lease agreements strictly prohibit driving screws into cabinet floors or altering permanent cabinetry, organizing cleaning products and toiletries requires damage-prevention engineering.
Unprotected rental cabinets face another hidden danger: moisture exposure. Most rental base cabinets are constructed from unfinished particleboard or standard medium-density fiberboard (MDF) that absorbs moisture rapidly. A minor leak from a sink strainer or a dripping spray bottle can cause cabinet floors to bubble and swell, leading to costly security deposit deductions. By combining waterproof base protection with freestanding modular shelving and sliding pull-out trays, tenants can double their usable storage volume without placing a single screw into landlord property.
Table of Contents
Cabinet and Plumbing Feasibility: Measuring the Obstacle Zone
Before purchasing organizers or plastic bins, assessing your cabinet dimensions and mapping the plumbing layout determines which storage configurations will fit without mechanical interference:
- Interior Cabinet Floor Measurements: Standard sink base cabinets measure between 24 inches and 36 inches in exterior width and 24 inches in exterior depth, yielding an interior usable depth of 21 to 22 inches. Always measure the clear interior width between cabinet face frames to ensure sliding units will pull out without catching door hinges.
- The Plumbing Clearance Corridor: Central drain stacks and curved P-traps require an unobstructed clearance corridor between 6 inches and 10 inches wide, while maintaining at least a 1-inch clearance buffer around water shutoff valves and flexible supply lines. Storage organizers must never rest against or exert pressure on shutoff valves, which could loosen compression fittings or trigger leaks.
- Garbage Disposal Footprint: Continuous-feed garbage disposals hang 12 inches to 15 inches downward from the sink basin bottom, occupying upper cabinet space and requiring specialized L-shaped tiered drawers that narrow at the top to clear the motor assembly.
- Particleboard Water Vulnerability: Unsealed particleboard cabinet floors can swell by up to 50% in thickness upon direct moisture contact, making a protective waterproof underlayment essential before adding storage racks.
- Cabinet Floor Flatness: Inspect the cabinet base floor for flatness and structural level. Sagging particleboard floors can cause freestanding sliding drawers to tip during extension, requiring a flat protective silicone mat to provide a level foundation for smooth operation.
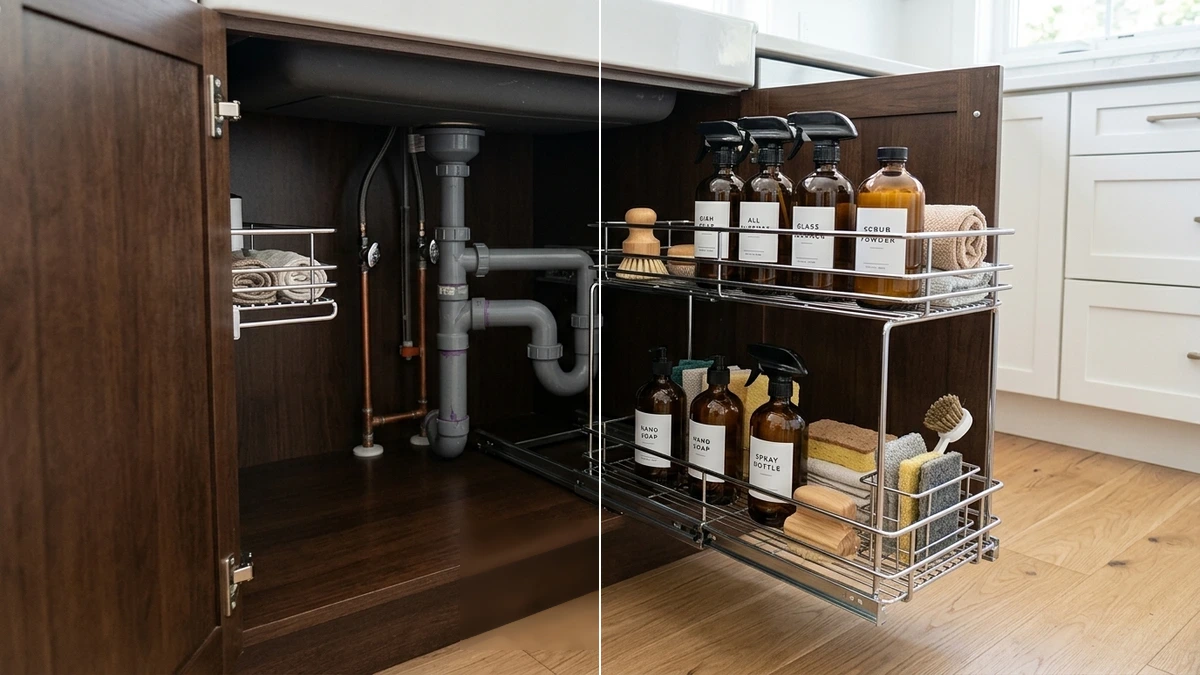
Under-Sink Storage System Comparison Matrix
Different storage configurations address distinct cabinet zones, from floor sliding access to vertical pipe bridging and door interior utilization. The comparison matrix below outlines the primary renter-friendly options:
| Storage System Type | Dimensions & Capacity | Plumbing Clearance Mechanics | Cabinet Protection Protocol | Best Rental Application |
|---|---|---|---|---|
| Expandable Pipe-Bridge Shelf | Expands 15 inches to 28 inches wide and supports up to 40 pounds of distributed load | Removable plastic snap-in panels reconfigure around vertical P-traps and supply pipes | Rubber foot pads rest directly on silicone drip mat without scratching wood | Bathroom vanities and double-basin kitchen sinks with complex central plumbing |
| L-Shaped Sliding Metal Drawer | Narrow 4-inch to 6-inch upper basket; supports 30 pounds to 45 pounds per sliding tier | Asymmetrical upper tier slides past garbage disposals and deep sink bowls | Heavy-gauge weighted base glides freely on silicone mat without mounting screws | Kitchen sinks with large garbage disposals and tall spray bottles below |
| Rotating Turntable Lazy Susan | Measures 10 inches to 12 inches in diameter and supports approximately 15 pounds to 20 pounds | Compact circular footprint tucks into deep corners beside drain pipes | Non-slip silicone base ring absorbs vibration and prevents base scuffing | Dark cabinet corners, liquid dish soaps, vinegar bottles, and aerosol cans |
| Adhesive Cabinet Door Caddy | Carries 4 pounds to 7.5 pounds of lightweight essentials; 4 pairs of 3M Command Large Picture Hanging Strips support up to 16 pounds | Clears interior shelving when door closes (requires door setback clearance) | Water-resistant adhesive strips release cleanly at move-out without damaging cabinet doors | Sponges, dishwashing pods, scrubber brushes, and everyday kitchen towels |
Essential Tools and Materials for Rental Cabinets
Creating a clean, water-resilient under-sink storage system requires reliable components that fit together without permanent fasteners:
- Flexible Silicone Drip Mat: Heavy-duty silicone drip mats feature raised 0.8-inch to 1-inch perimeter edges capable of holding 1.5 to 3.3 gallons of liquid to contain unexpected leaks.
- Expandable Pipe-Bridge Shelving: Adjustable steel frame that expands 15 inches to 28 inches wide and supports up to 40 pounds of distributed load across removable snap-in panels.
- Freestanding L-Shaped Sliding Drawer: Ball-bearing pull-out steel basket featuring a narrow 4-inch to 6-inch upper basket supporting 30 pounds to 45 pounds per sliding tier.
- Adhesive Cabinet Door Caddy: Lightweight wire mesh or acrylic pocket basket supporting 4 pounds to 7.5 pounds for door interior mounting.
- 3M Command Water-Resistant Strips: Moisture-tolerant elastomeric adhesive strips (or 4 pairs of 3M Command Large Picture Hanging Strips rated up to 16 pounds) for door caddy stabilization.
- Cleaning Supplies: 70% isopropyl alcohol wipe for surface preparation, microfiber cleaning cloths, and a steel tape measure.
- Upright Chemical Storage Bins: Rigid plastic bins with solid bottoms for safely containing harsh cleaning chemicals.
Step-by-Step Installation: The No-Drill Under-Sink Method
Executing an under-sink organization project that protects rental cabinetry and provides effortless access to cleaning essentials involves five practical steps:
Step 1: Measure Cabinet Dimensions and Plumbing Clearances
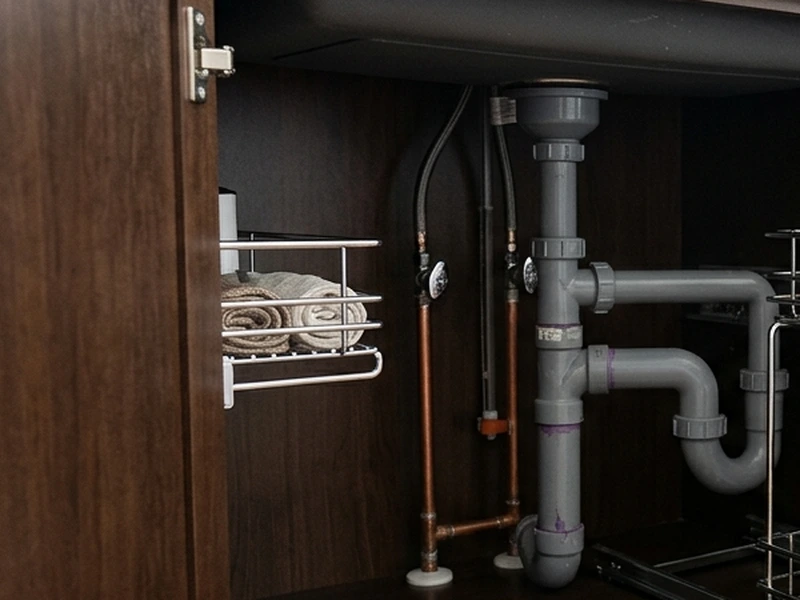
Begin by completely emptying the cabinet cavity. Inspect the plumbing connections—including the sink drain flange, P-trap slip nuts, and water shutoff valves—using a bright flashlight. Run the faucet briefly to check for moisture seepage along threaded pipe joints.
Using a metal tape measure, verify that your interior cabinet depth accommodates the standard 21 to 22 inches needed for pull-out hardware. Measure the plumbing clearance corridor, ensuring at least 6 inches to 10 inches wide around central drain pipes and maintaining at least a 1-inch clearance buffer around water shutoff valves and flexible supply lines.
Step 2: Lay the Protective Waterproof Silicone Drip Mat
Rental cabinet floors are frequently made from particleboard that swells upon water contact. Installing a waterproof barrier represents the single most cost-effective way to protect your security deposit. Wipe down the interior cabinet floor with a damp microfiber cloth and allow it to dry thoroughly.
Unroll a heavy-duty food-grade silicone drip mat sized to your cabinet base. Push the mat firmly into the back corners so the raised 0.8-inch to 1-inch perimeter lip sits upright against the cabinet walls. This flexible silicone tray creates an impervious barrier holding 1.5 to 3.3 gallons of liquid to contain leaks and spills before moisture can penetrate cabinet wood.
Step 3: Position Freestanding Sliding Drawers or Modular Pipe Racks
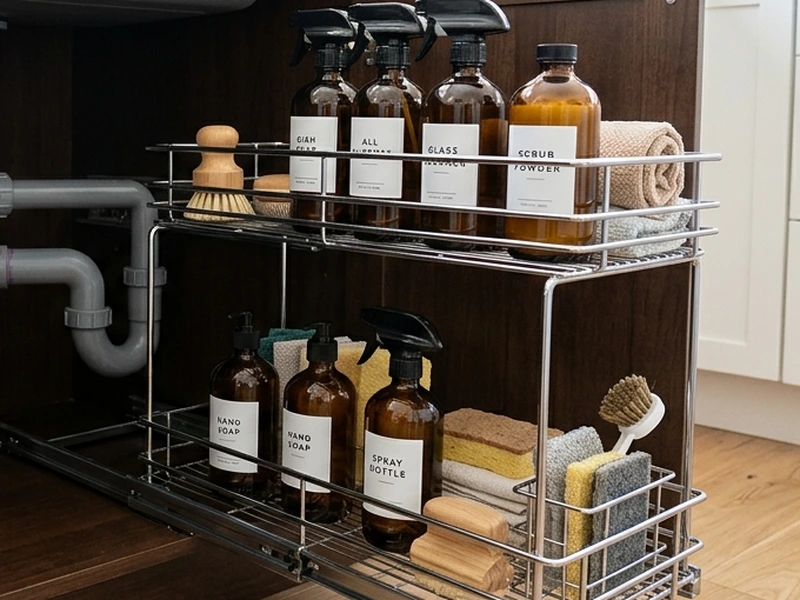
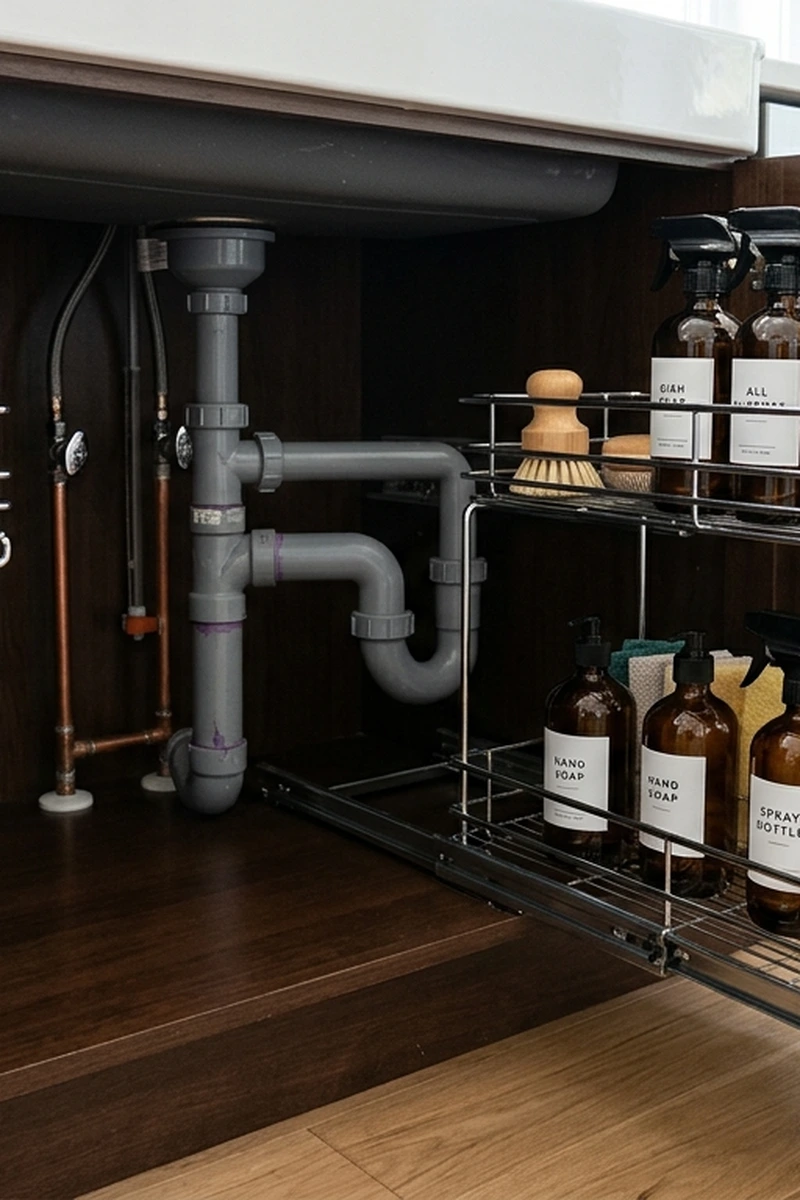
Assemble your freestanding sliding organizers outside the cabinet. For kitchen sinks equipped with continuous-feed disposals that hang 12 inches to 15 inches downward, place an L-shaped sliding drawer on the disposal side. The narrow 4-inch to 6-inch upper basket glides smoothly past the disposal motor while the bottom drawer carries heavy spray bottles.
On the opposite side, assemble an expandable pipe-bridge shelf that expands 15 inches to 28 inches wide. Position the removable snap-in panels around vertical P-traps and supply pipes. Because modern freestanding units rely on heavy-gauge steel bases and rubber feet resting on the silicone mat, they support 30 pounds to 45 pounds per sliding tier without shifting or requiring mounting screws.
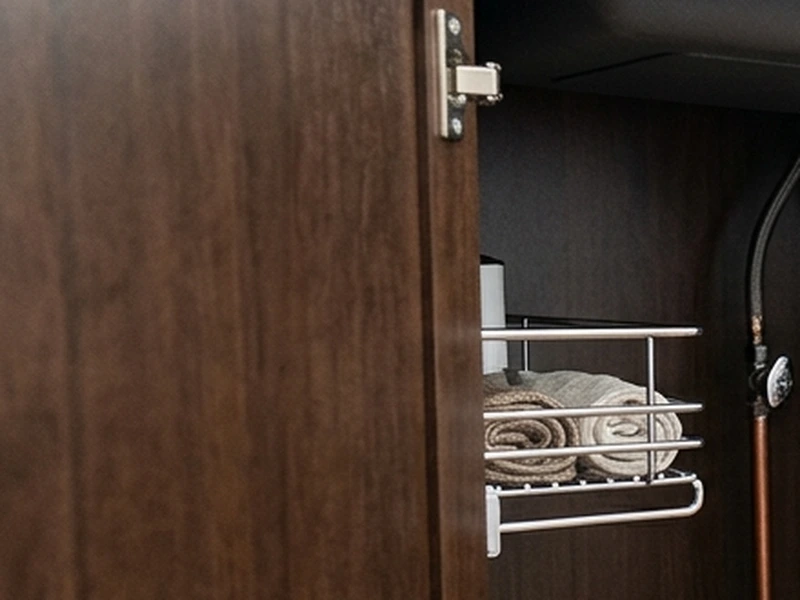
Step 4: Mount Adhesive Door Storage Caddies
Cabinet door interiors offer prime real estate for quick-grab items like sponges, scrubbers, and dishwashing pods. Clean the door interior contact surfaces with a 70% isopropyl alcohol wipe, allowing around 10 minutes of drying time for complete alcohol evaporation.
Apply 3M Command Water-Resistant Bath Caddy Strips to the mounting brackets of your wire or acrylic caddy. Press adhesive strips firmly for approximately 30 seconds to activate the pressure-sensitive bond. Ensure the caddy is positioned so it clears interior sliding drawers when the cabinet door swings closed.
Step 5: Organize Cleaning Supplies with Upright Chemical Bins
Proper categorization and chemical safety protect your home and stored essentials. Place rigid plastic storage bins with solid leak-proof bottoms on lower sliding tiers. Store all cleaning bottles upright within these bins.
Always maintain strict segregation between reactive cleaning chemicals—specifically chlorine bleach and ammonia-based window cleaners—by keeping them in separate dedicated plastic containers. In the rear corner beside plumbing lines, tuck a rotating turntable lazy susan measuring 10 inches to 12 inches in diameter to keep specialty cleaners and extra sponges within effortless reach.
Move-Out Removal: Safe Cabinet Extraction Protocol
When preparing to relocate, dismantling your no-drill under-sink storage system takes only a few minutes without leaving traces or surface marks behind:
- Empty All Storage Containers: Unload all cleaning supplies, bottles, and door caddy accessories before moving any hardware.
- Slide Out Freestanding Units: Lift the sliding metal drawer units and expandable pipe racks directly upward from the cabinet floor. Because no screws were used, units lift out freely.
- Remove Door Caddies with Stretch-Release: To remove adhesive door caddies, never pull brackets outward away from the door. Stretch the adhesive release tab slowly straight downward parallel to the cabinet door for 12 to 15 inches until the strip releases cleanly without peeling paint.
- Roll Up the Silicone Drip Mat: Check the surface of the silicone drip mat for any standing water or detergent residue. Wipe dry with a microfiber cloth, lift the flexible mat out of the cabinet, and wash it in warm soapy water for reuse in your next apartment.
- Final Cabinet Floor Inspection: Wipe down the clean particleboard floor. Confirm that the wood surface remains dry, flat, and intact for a smooth move-out inspection.
Related Rental Organization Guides
Explore our companion storage tutorials to maximize vertical space across every room in your rental apartment:
- Over-the-Door Organizing Hacks: Maximize vertical storage on interior doors without damaging hinges or woodwork.
- Tension Pole Shelving Guide: Floor-to-ceiling vertical shelving units that require zero wall anchors.
- Under-Cabinet Wireless LED Lighting: Brighten dark kitchen counters with rechargeable magnetic puck lights.
- Rental Storage Category Hub: Discover renter-friendly shelving and organizational hardware for apartments.
Frequently Asked Questions About Under-Sink Storage
How do you organize around a garbage disposal under a rental sink?
Organizing around a garbage disposal requires modular, asymmetrical storage units. Use an L-shaped 2-tier sliding drawer featuring a narrow 4-inch to 6-inch upper basket that clears the disposal motor alongside a full-width lower drawer. On the opposite side of the cabinet, install an expandable pipe-bridge rack with removable plastic slats that can be arranged around vertical P-trap pipes.
Do under-sink pull-out organizers require drilling into rental cabinets?
No, high-quality modern under-sink sliding drawers do not require drilling or screws. Freestanding sliding systems utilize heavy-gauge steel bases and smooth ball-bearing glides that remain stable under the weight of stored cleaning bottles. Placing the organizer on a non-slip silicone drip mat provides traction and prevents the base from shifting when drawers are extended.
How do you protect rental cabinets from under-sink water leaks?
The most effective protection is a heavy-duty food-grade silicone under-sink drip mat with raised 0.8-inch to 1-inch perimeter edges. These flexible trays fit snugly across the cabinet base, holding between 1.5 and 3.3 gallons of liquid to contain plumbing drips and chemical spills before moisture can penetrate and swell vulnerable particleboard floors.
What is the safest way to store cleaning chemicals under a rental sink?
Store all cleaning chemicals upright in rigid plastic storage bins with solid, leak-proof bases. Keep incompatible chemicals—such as chlorine bleach and ammonia-based cleaners—strictly separated in different bins. Ensure that all storage containers leave at least a 1-inch clearance buffer around water shutoff valves and flexible supply lines to avoid accidental mechanical pressure on plumbing connections.
